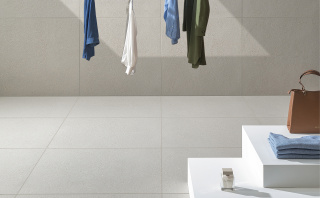
Grout line widths are a personal preference. There is no such thing as an ideal size for grout lines, although we must admit that small tiles do tend to look their best with narrow grout joints. If you have your heart set on tight grout joints, then you are in for a challenge! Although grouting narrow joints is basically the same process as grouting wider joints, forcing grout into those small spaces can prove quite challenging. But no one said it’s impossible! Here are a few insider tips and tricks to help you install the perfectly tight grout joint.
Choose rectified tiles
Rectified tiles are consistent in size and therefore ideal to combine with narrow grout joints. Keep in mind, however, that there is still a little ‘wiggle room’ during installation. We recommend unsanded grout for joints up to 1/8 inch wide.
10 steps for grouting narrow grout lines
- Mix the grout
Pour unsanded tile grout into a bucket and mix it with water, carefully following the instructions on the package. Make sure not to mix more than you can apply within half an hour.
- Let the grout rest
Let the grout rest in the bucket for as long as the packaging recommends. Although thin grout is easier to force into those tight grout joints, the grout shouldn’t be runny like pancake batter. Aim for grout that is slightly stiff.
- Scoop
Scoop up grout from the bucket and smear it onto the edge of a grout float. Use a grout float with a foam back to avoid scratching the tiles.
- Spread
Spread the grout across the tile while it’s still wet.
- Force the grout into the grout lines
Drag the edge of the grout float across the tiles, forcing the grout into the grout lines. Pull the edge of the float back and forth in as many directions as you can until there are no more air pockets left in the grout lines.
- Scrape off excess
Use the edge of the float to scrape off excess grout from the tiles.
- Apply more grout
Apply more grout and work it into the joints once more.
- Let the grout rest
Let the grout rest for approximately 10 minutes until it has turned a lighter colour.
- Wipe
Are you able to touch the grout without getting residu on your finger? Then soak a sponge with water and squeeze out the excess. The sponge should be as dry as possible. Wipe the sponge across the tiles to remove residual grout, but be careful not to wipe off the grout in the joints. Use circular motions to prevent the grout from attaching to the tiles.
- Wait and wipe once more
Wait 24 to 72 hours until a powdery residue forms across the tiles. It is crucial that you wait for the grout to be completely dry. Once the grout is dry, wipe it off with a dry rag. Again, be careful not to dislodge the grout in the joints.
Contact Mosa for more advice on rectified tiles, how to install grout joints and much more. We’re always happy to help!
